
These days, the cameras in your phones can have almost as many features as professional cameras. But this is only helpful if you know how to use them. For anyone shooting on a iPhone, once you've nailed the basic photography tips, there are so many other ways you can capture the perfect street style moments. From file sizes to frame rates, these are the iPhone photography tips to help you snap professional-looking shots every time.
1. Having trouble getting the right perspective? Flip your phone upside down
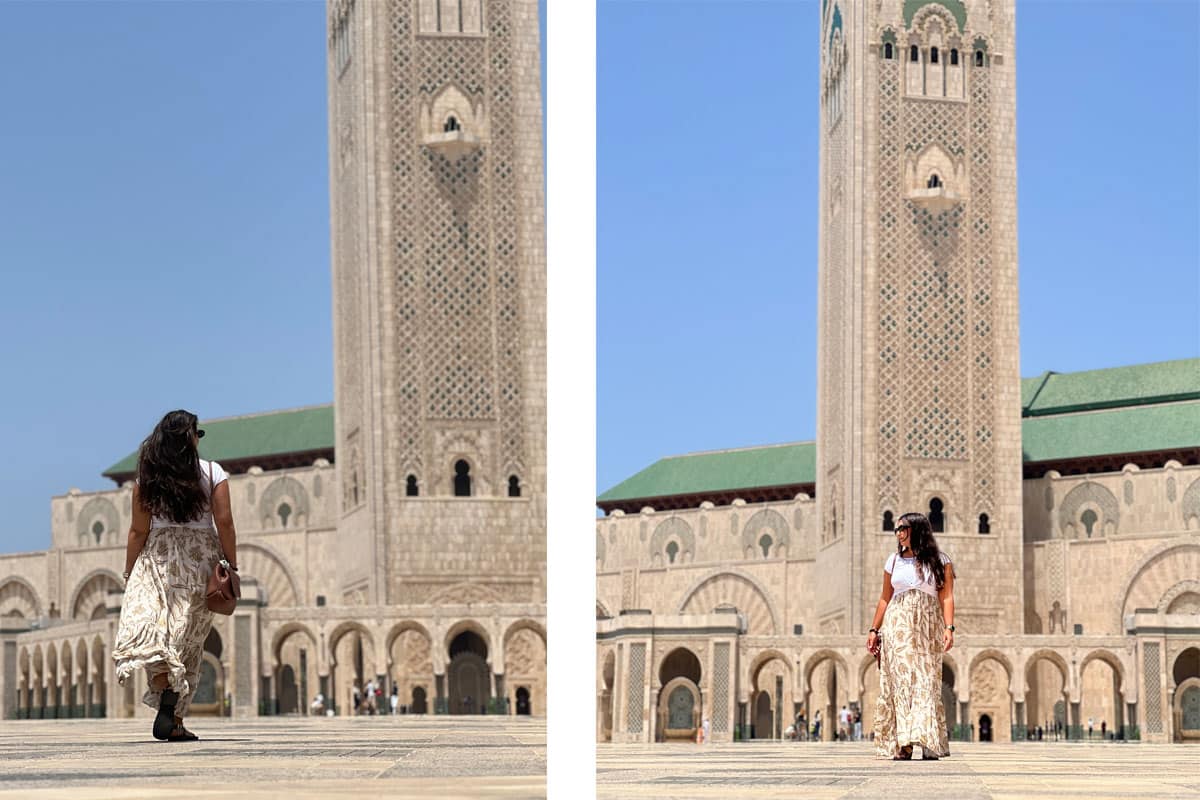
If you want to get more length in your photos, flipping your phone upside down allows you to take your photos from lower down without having to crouch. It helps to capture the full length of a dramatic look.
2. Play with your exposure

Tap your screen to pick a focal point, then slide your finger up and down the screen to adjust the exposure. This is an interesting way to exaggerate light rays or lens flares.
3. Switch on ProRAW
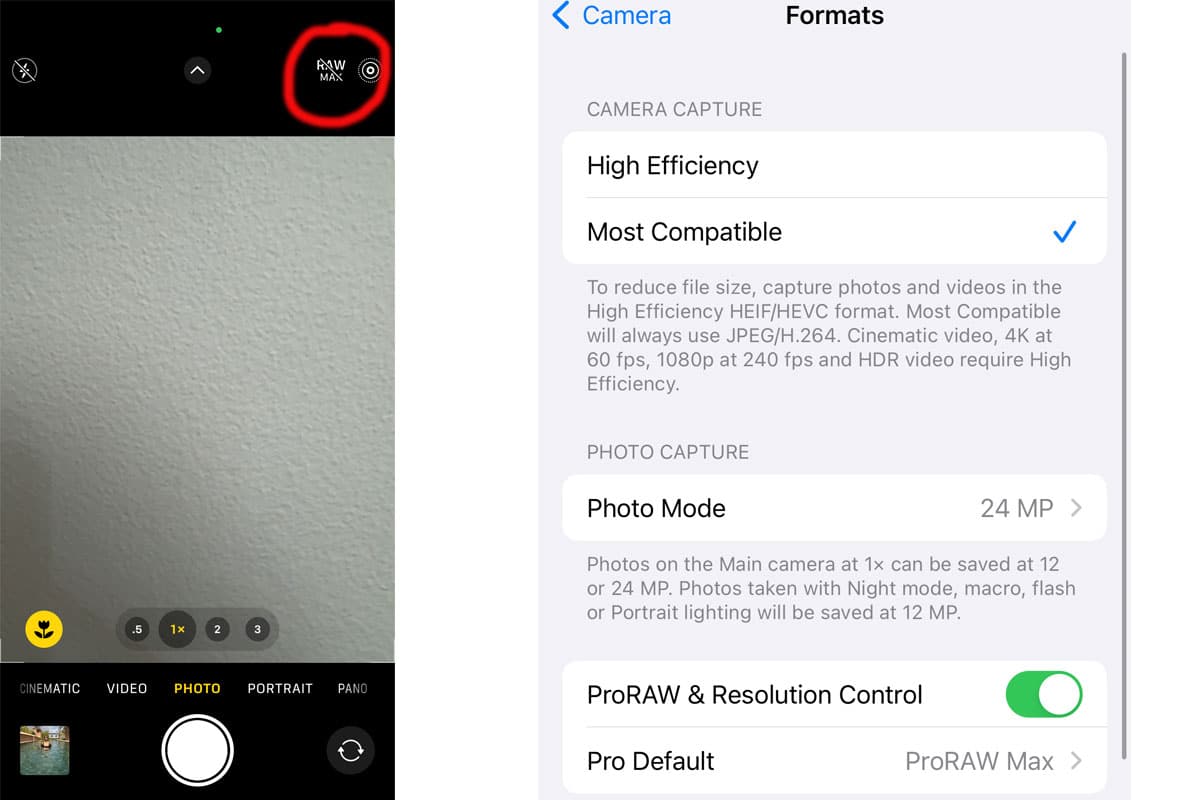
ProRAW mode captures more data points in each image. It means that when it comes time to edit, you'll be able to make more advanced changes. It also stops your iPhone from automatically processing the image for you, so you have complete control over how your photo will look.
Just remember to turn it off when you don't need it, as it makes your file sizes huge.
4. Change your focal point in post edit
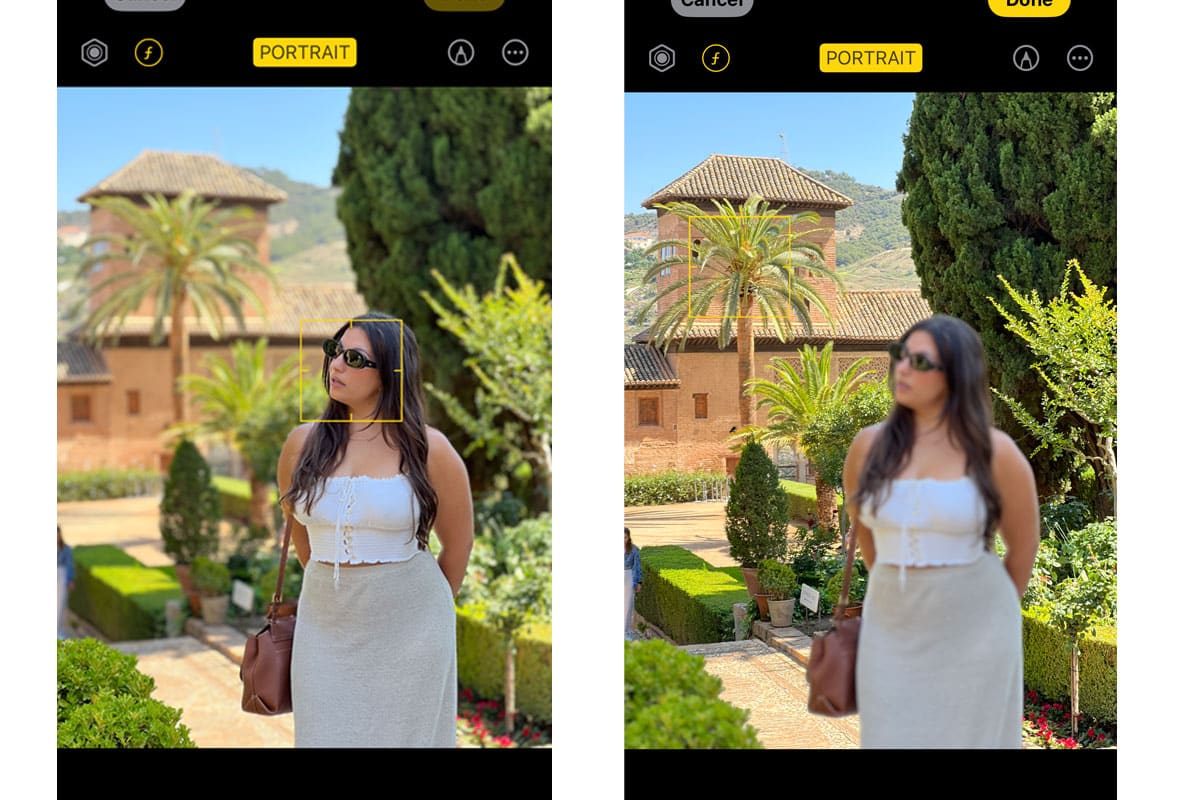
Let's say you've taken a cool shot, but you camera has focused on a particular aspect of the image you don't like. No problem. You can change this in when you're editing. It's an interesting way to create a unique image. Try it out.
5. Ditch the flickering of fluorescence by changing your recording speed
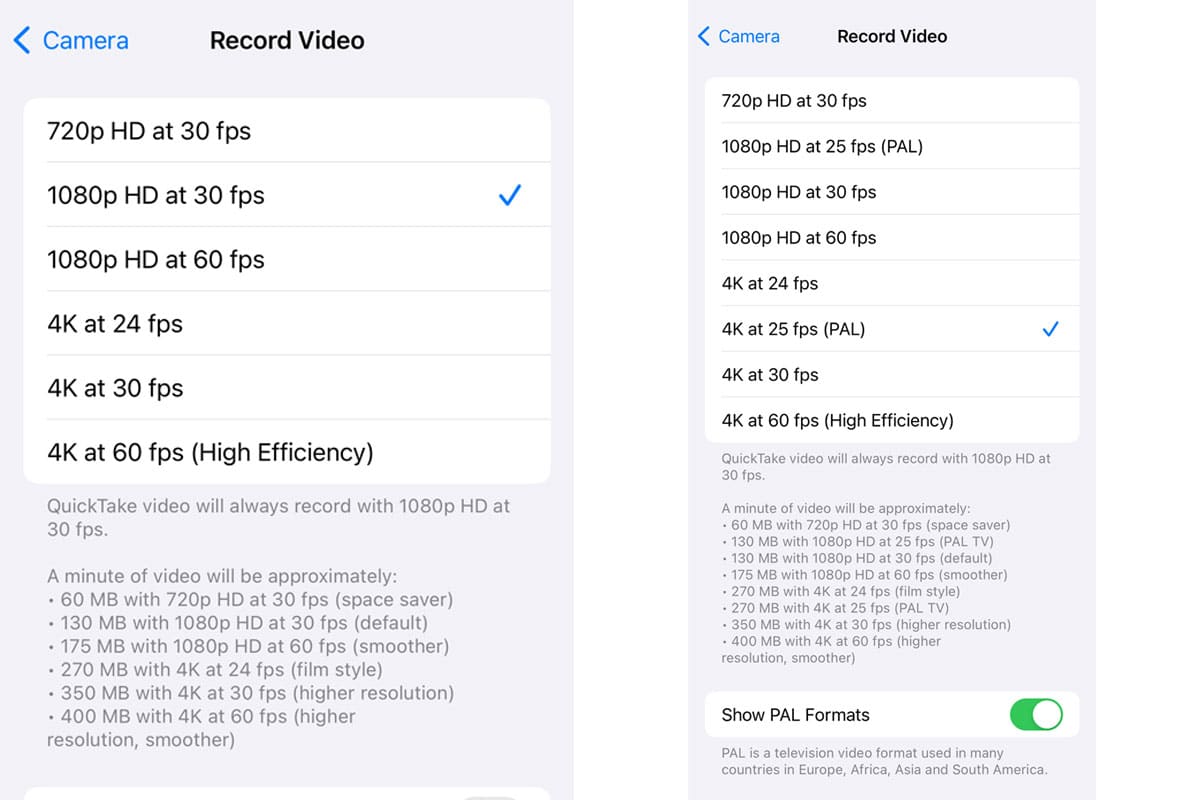
Are you recording video inside and you notice that the lights are flickering. It's because the speed of the light flicker is slower than the camera frame rate. You can go into your settings and reduce your frame rate to 25 by switching to PAL. This will remove that annoying fluorescent flicker.
6. Copy and paste your favourite edits
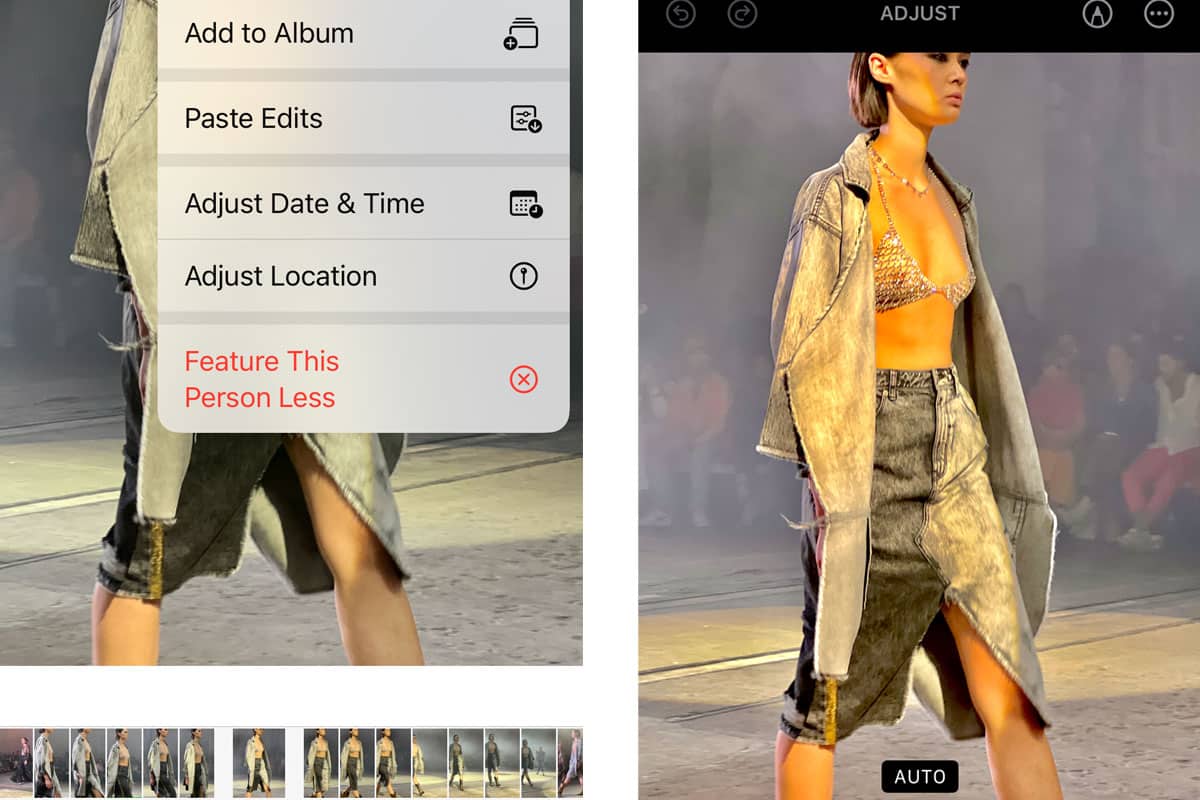
Have you ever edited the levels of an image and been particularly pleased with the result? Did you know on the newer iPhone models you can actually take these edits and paste them directly over other photos? This allows you to create a cohesive collection of images or recreate interesting edits without having to spend unnecessary time on manual adjustments.
7. Use Action Mode to avoid the shakes
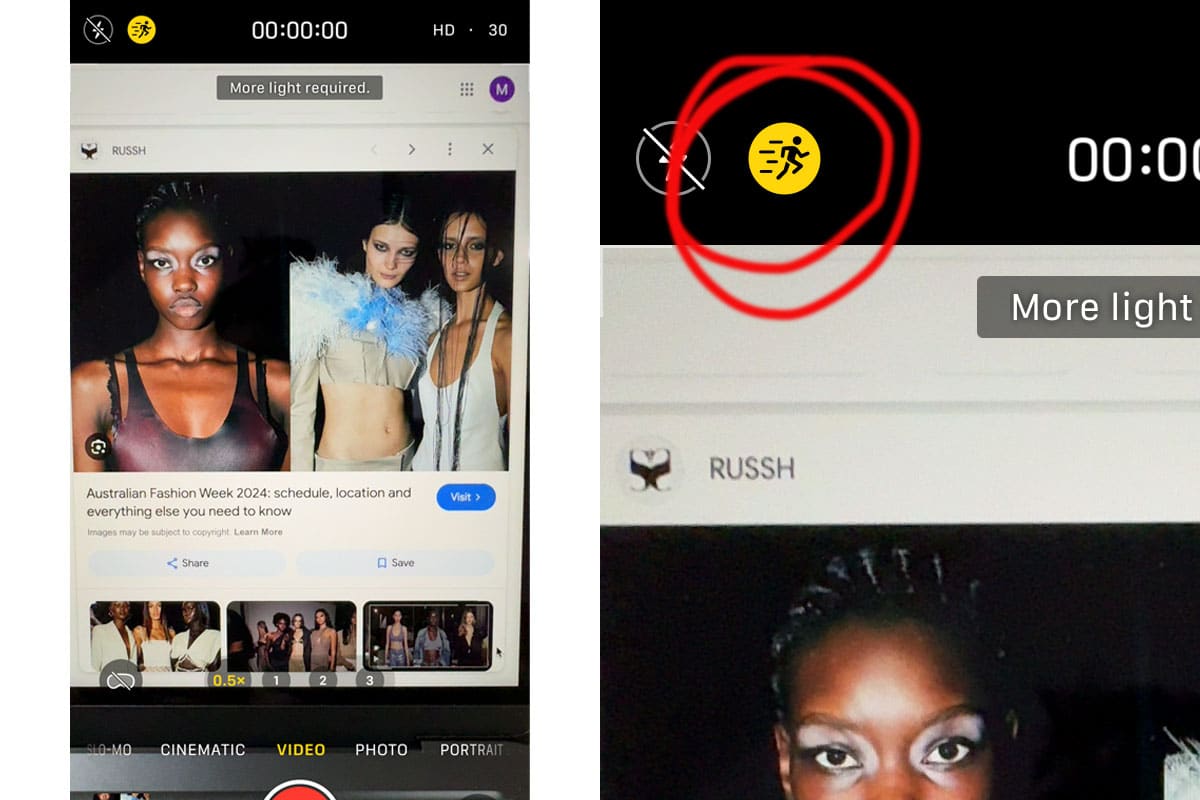
Trying to shoot a moving target? Models on a catwalk? Street moments? Try using action mode. It helps to stablise your shot so you can avoid the shakiness that often comes with videoing movement. Just tap on the little action figure when you're in video mode to turn it on.
8. Preserve Settings can take the leg work out of customising your shot
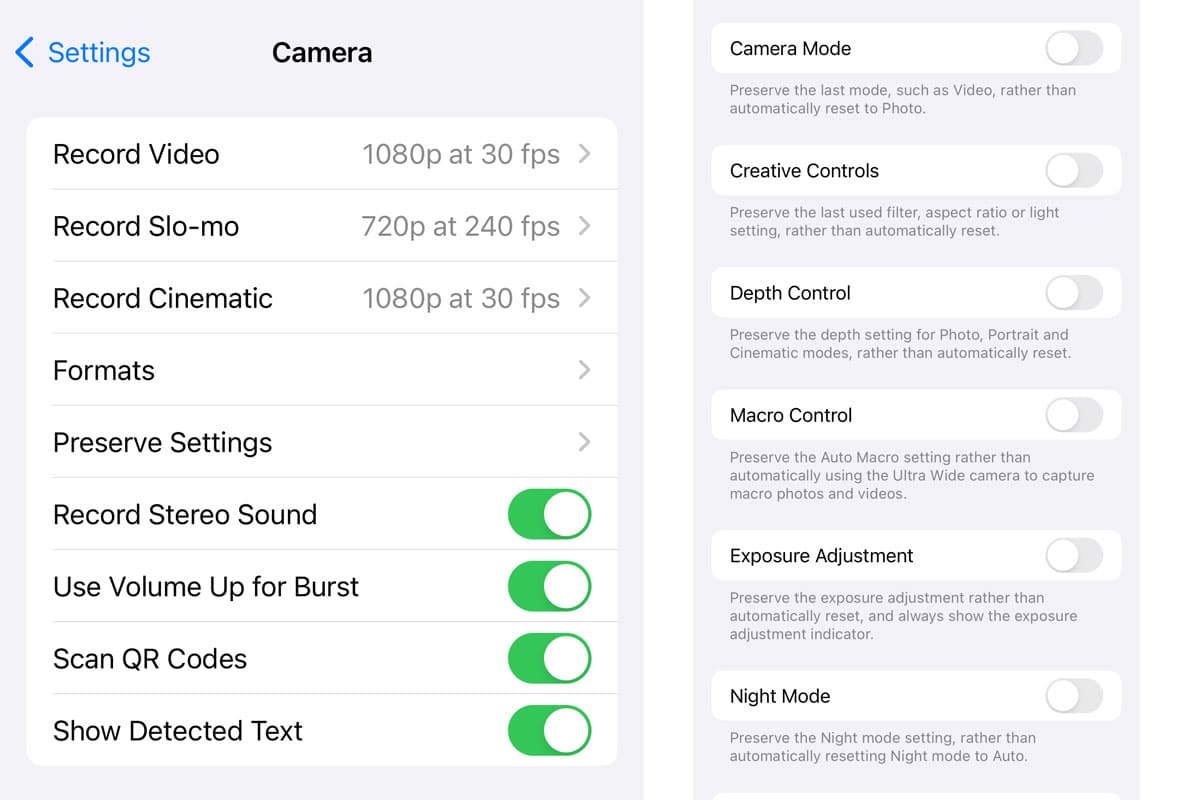
So, you've adjusted your exposure, switched up your night mode and turned off the macro control to take a great shot. But you've taken the photo, your phone has defaulted it is original setting and now you have readjust your controls to create the same look again. Try using the preserve settings feature. You can ask you camera to hold certain adjustments and prevent your iPhone camera from defaulting to its standard. That way you can snap away without needing to readjust.


